Setting Up A Virtual Machine
1. Getting a Windows ISO
To install Windows on the virtual machine, you will need a Windows ISO file. You can skip this section if you already have a Windows ISO file.
- Open the
CrystalFetchapp. - Select
Windows 11from the list of versions (Windows 10should also work, but we recommend usingWindows 11). - Select
Apple Siliconfrom the list of architectures - Select any language you prefer, or leave it as default, which should be
English (United States) - Press
Download...to download the Windows ISO file - Select your preferred download location (your
Downloadsfolder is probably the default and good enough) and pressMove.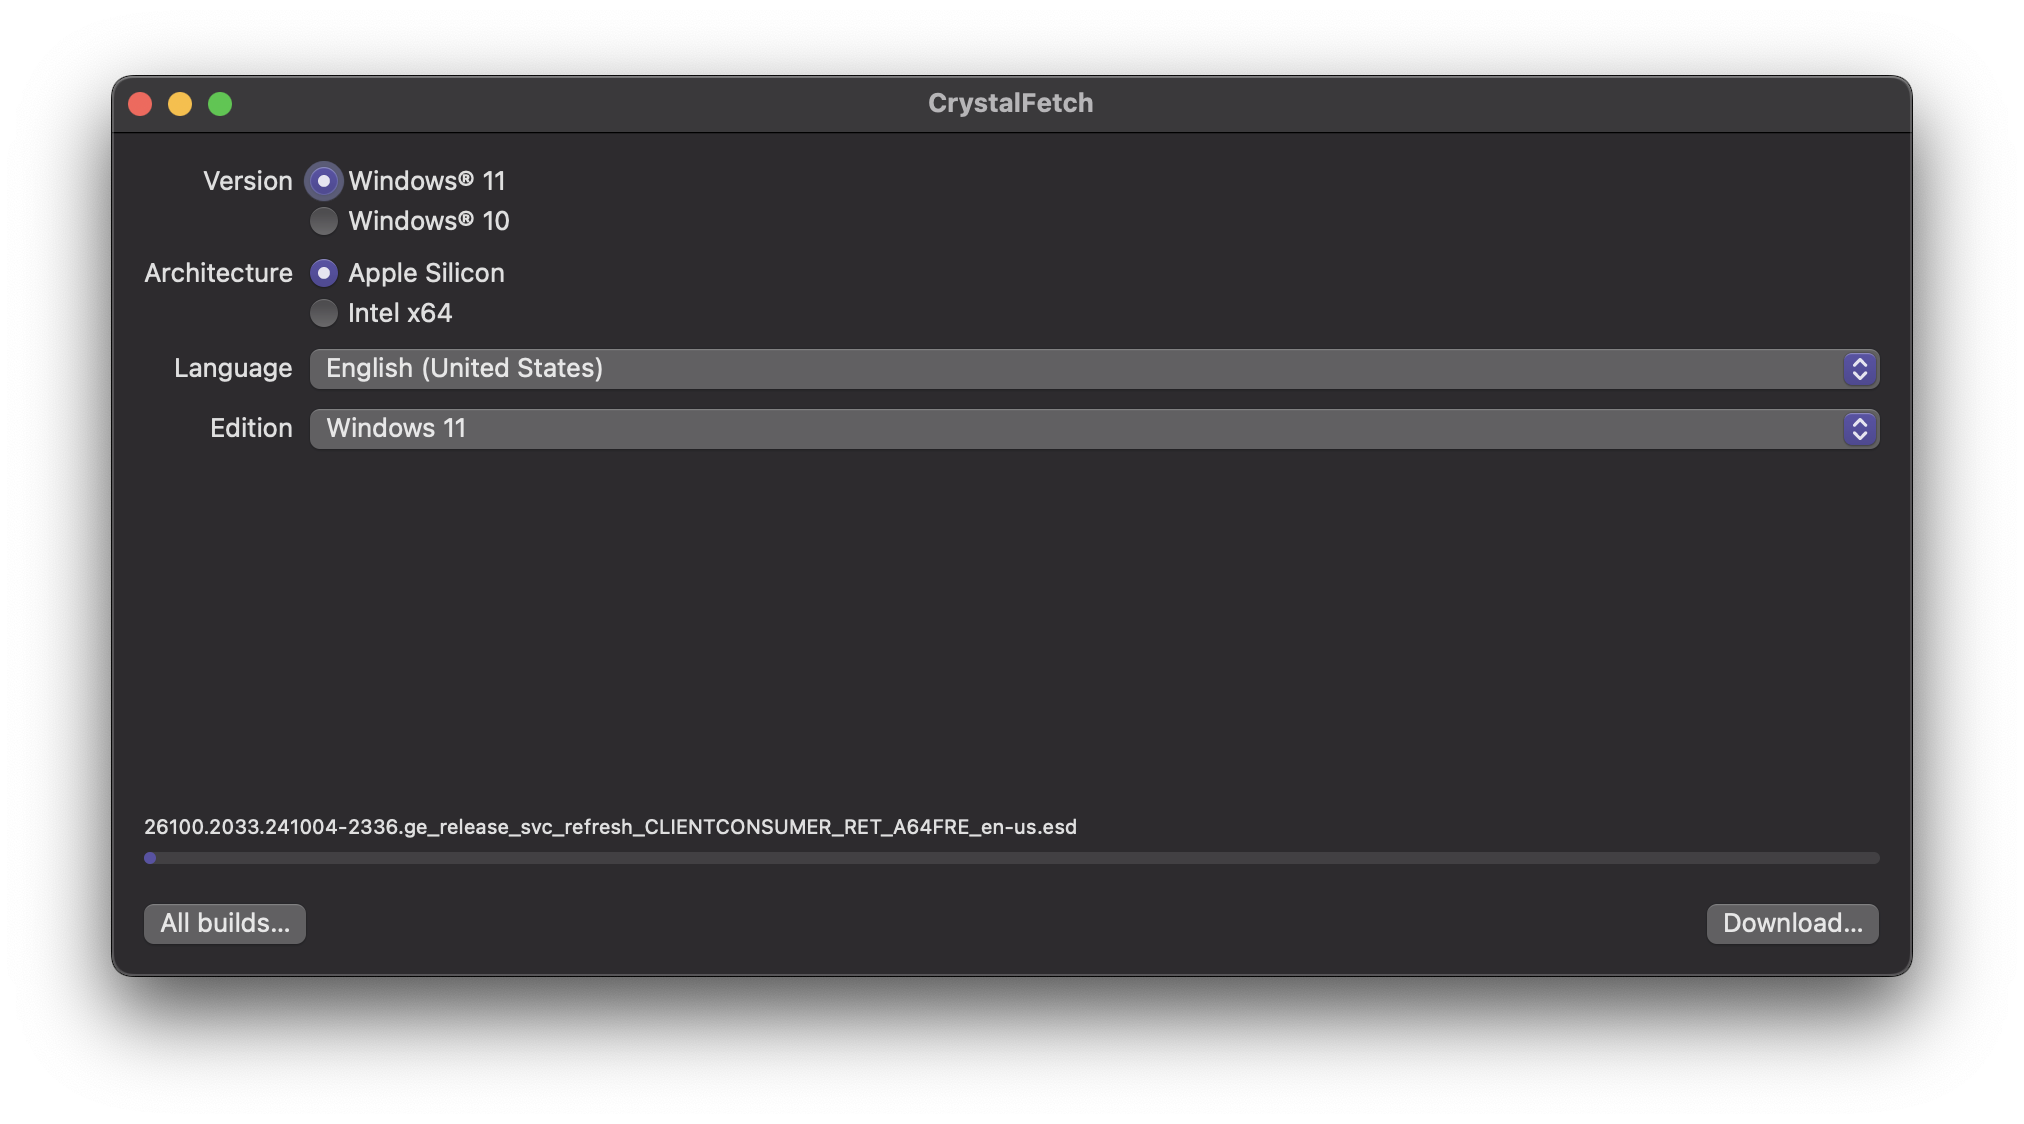
2. Creating the Virtual Machine
-
Open the
UTMapp.noteWhen launching UTM for the first time, you may get a pop-up asking if you want to open it. Press
Open. You may also get a "What's New" pop-up after it opens. Just pressContinueto go to the next step. -
Click on
Create New Virtual Machine -
Select
Virtualizeand clickWindows -
Make sure these settings are selected:
Install Windows 10 or higheris checkedImport VHDX Imageis uncheckedInstall drivers and SPICE toolsis checked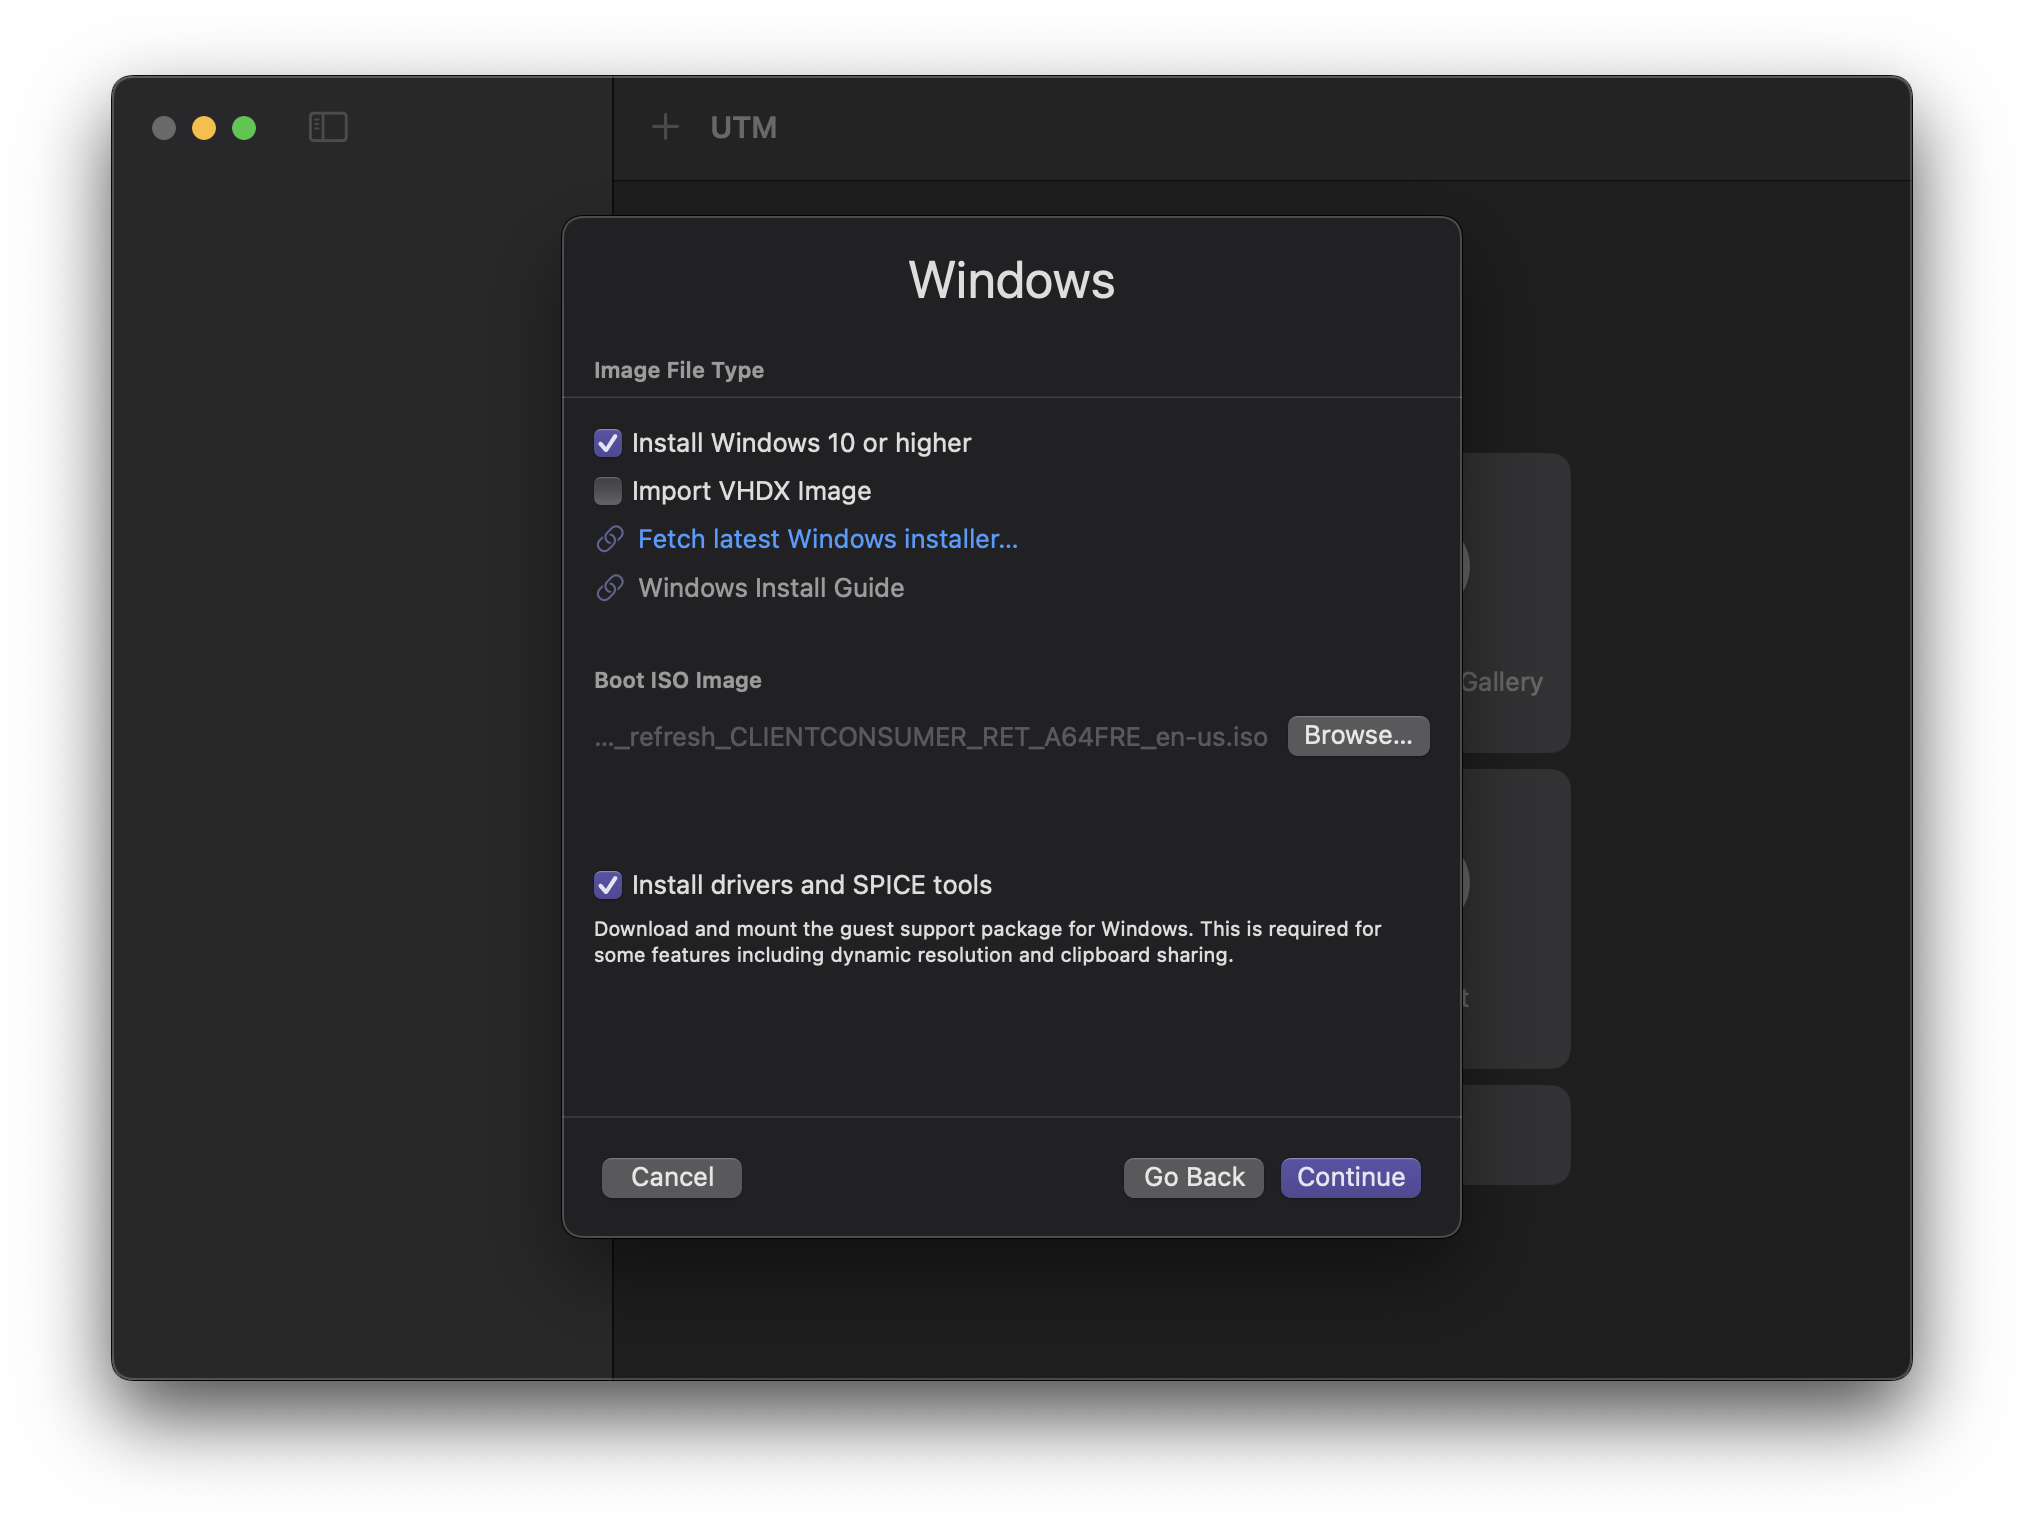
-
Press
Browse...and select the Windows ISO file you downloaded earlier, then pressContinue. -
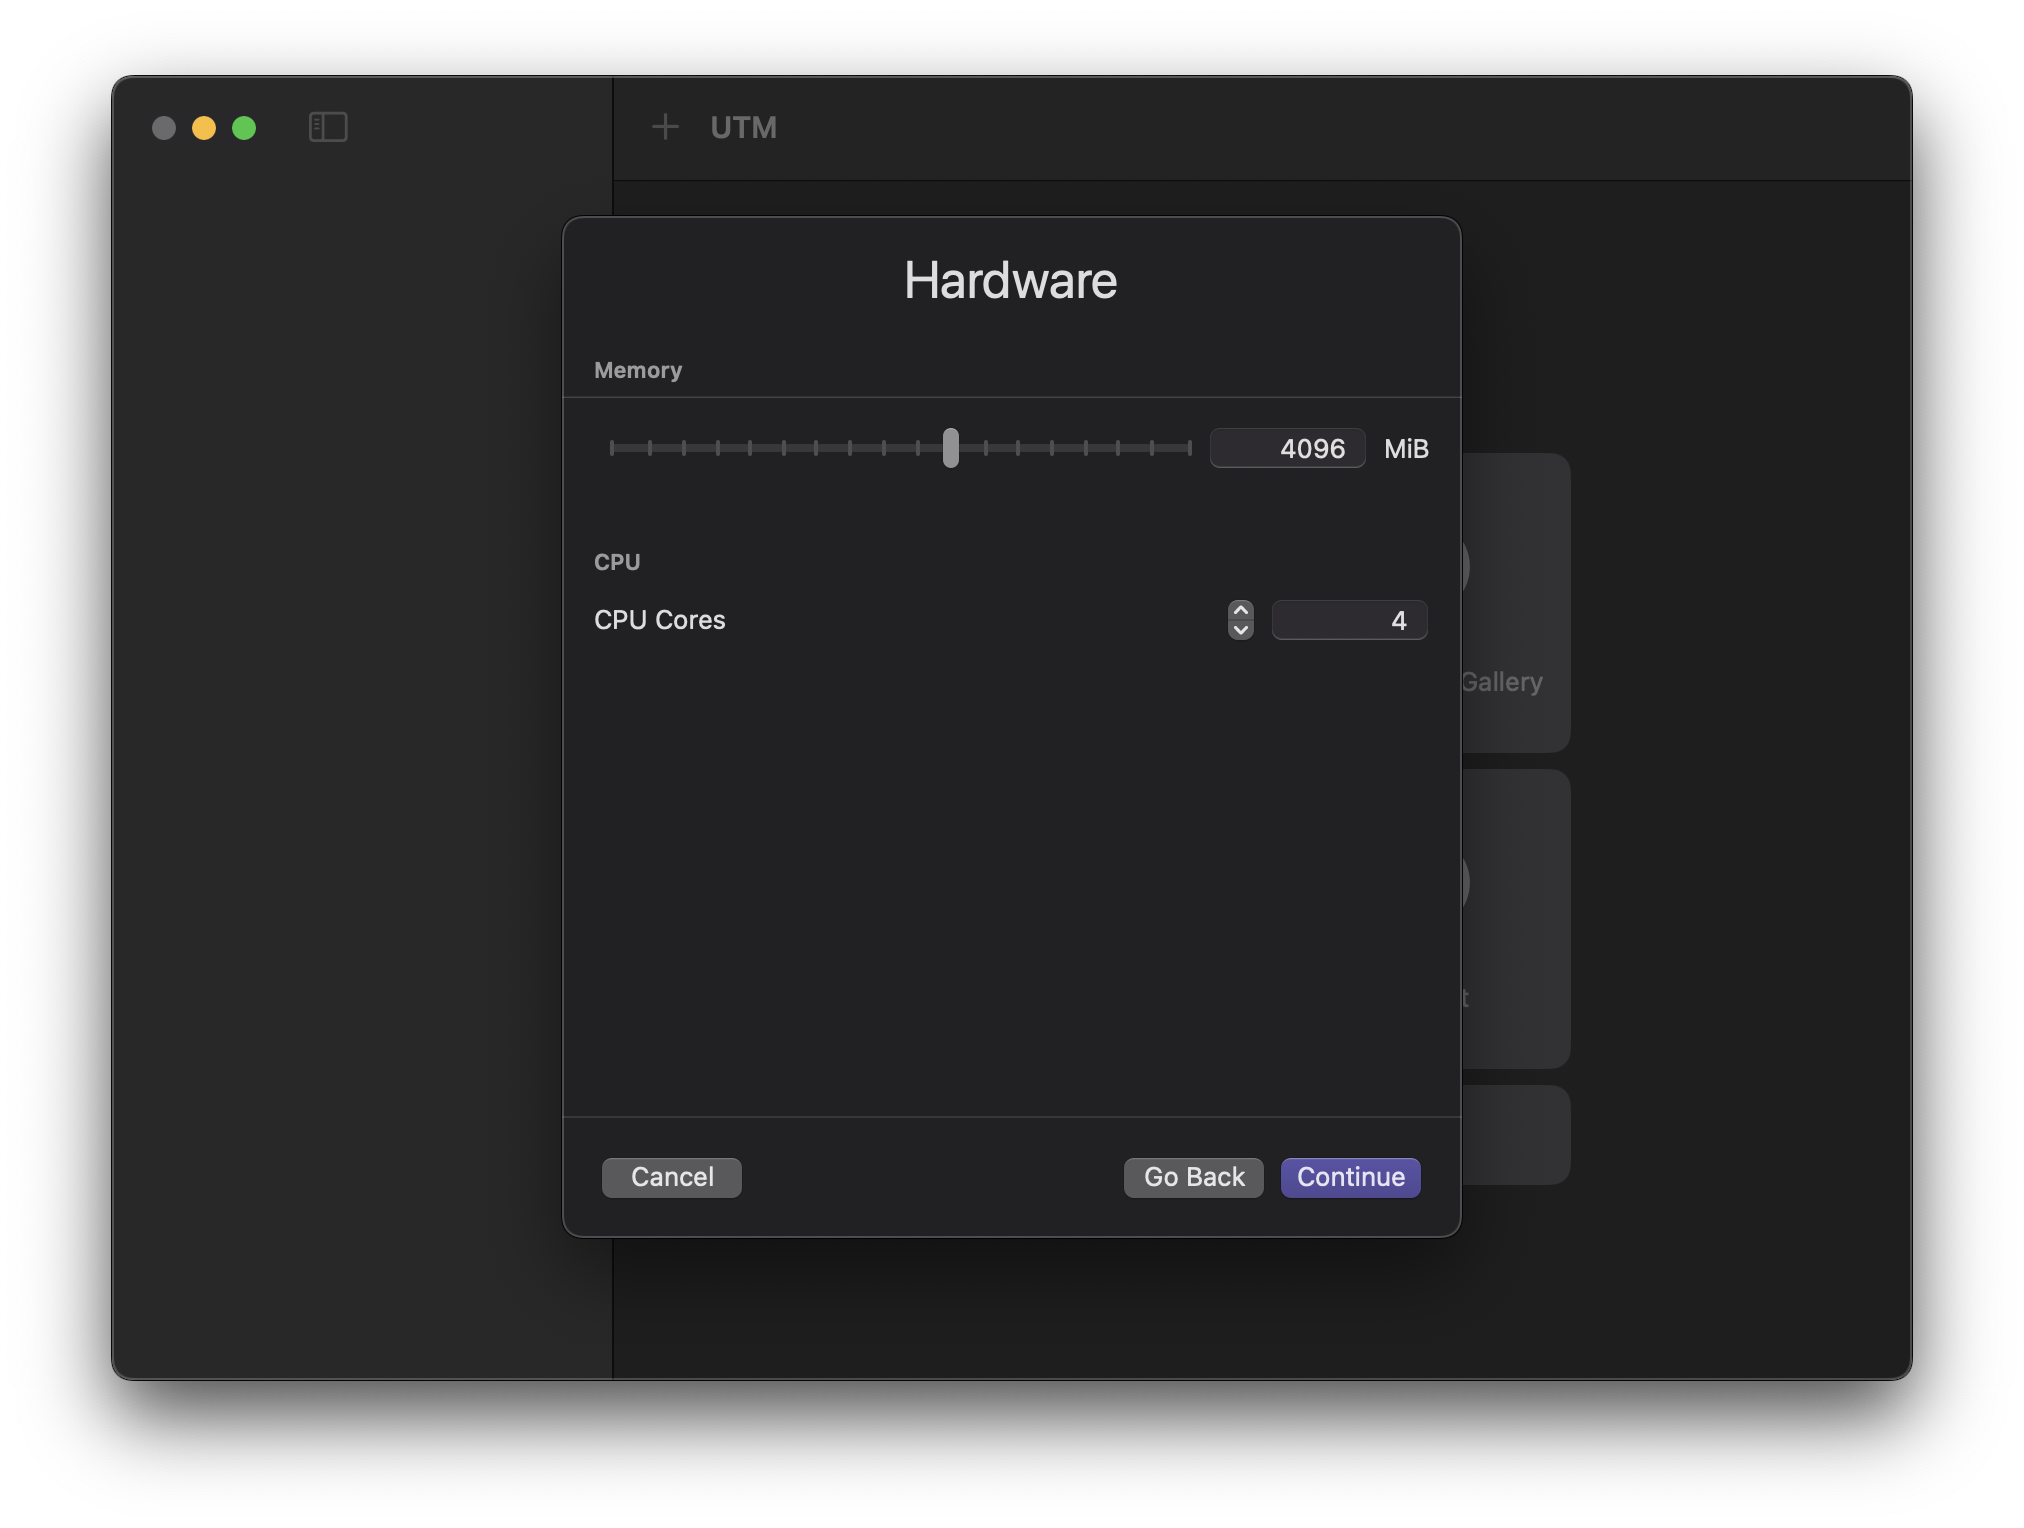
Select the following settings:
-
Memory:4096 MB(4 GB) or morenoteWe recommend setting the memory to 8 GB and the CPU cores to 8 if you have enough resources for it. A good rule of thumb is to allocate half of your system's RAM and CPU cores to the virtual machine.
-
CPU Cores:4or more
-
-
Press
Continue. The default of 64GiB is fine for the disk size, but you can increase it if you want. PressContinueagain. -
If you wish to make a folder that is shared between macOS and your virtual machine, you can set it up here. Otherwise, press
Continue. -
Change the name of the virtual machine if you want, then press
Save. Don't worry about the other settings.
3. Configuring the Virtual Machine
- Click on the virtual machine you just created and press the configure button
 , which is next to the play button in the upper right corner.
 - Click on
Displayin the left sidebar. - Ensure
Resize display to window size automaticallyis ticked. - Press
Save. - Press
Command+,to open UTM settings. - Click
Displayin the top bar. - Change the
Renderer BackendtoANGLE (Metal). - Close the settings window.
4. Installing Windows
If you see "Windows Guest Support Tools" under Pending in your sidebar, wait for it to finish installing before proceeding.
- Click on the virtual machine you created and press the play button in the upper right corner.
- When the window pops up, spam any key on your keyboard to boot to the Windows installer.
- Wait for the installer to load.
- Follow the instructions to install Windows.
- When asked for a product key, skip it by pressing
I don't have a product key. We will activate Windows later. - Select
Windows 11 Prowhen asked which version to install. - When asked where to install Windows on, there should be only one option in the list. Select it and press
Next.
- When asked for a product key, skip it by pressing
- Wait for Windows to install. This will take a while.
- The installer will restart the virtual machine.
5. Going Through Windows Setup
Wait for the Windows setup screen to show up. Setting up Windows is quite straightforward. Just follow the instructions on the screen. However, there are a few things to note:
- Windows may restart a few times during the setup process. This is normal. Do not spam any keys during these restarts.
- If you get stuck on a screen with the UTM logo and a spinning circle after a restart, feel free to restart the virtual machine by closing the window and pressing the play button again.