Setting Up A Virtual Machine
1. Getting a Windows ISO
To install Windows on the virtual machine, you will need a Windows ISO file. You can skip this section if you already have a Windows ISO file.
- Open the
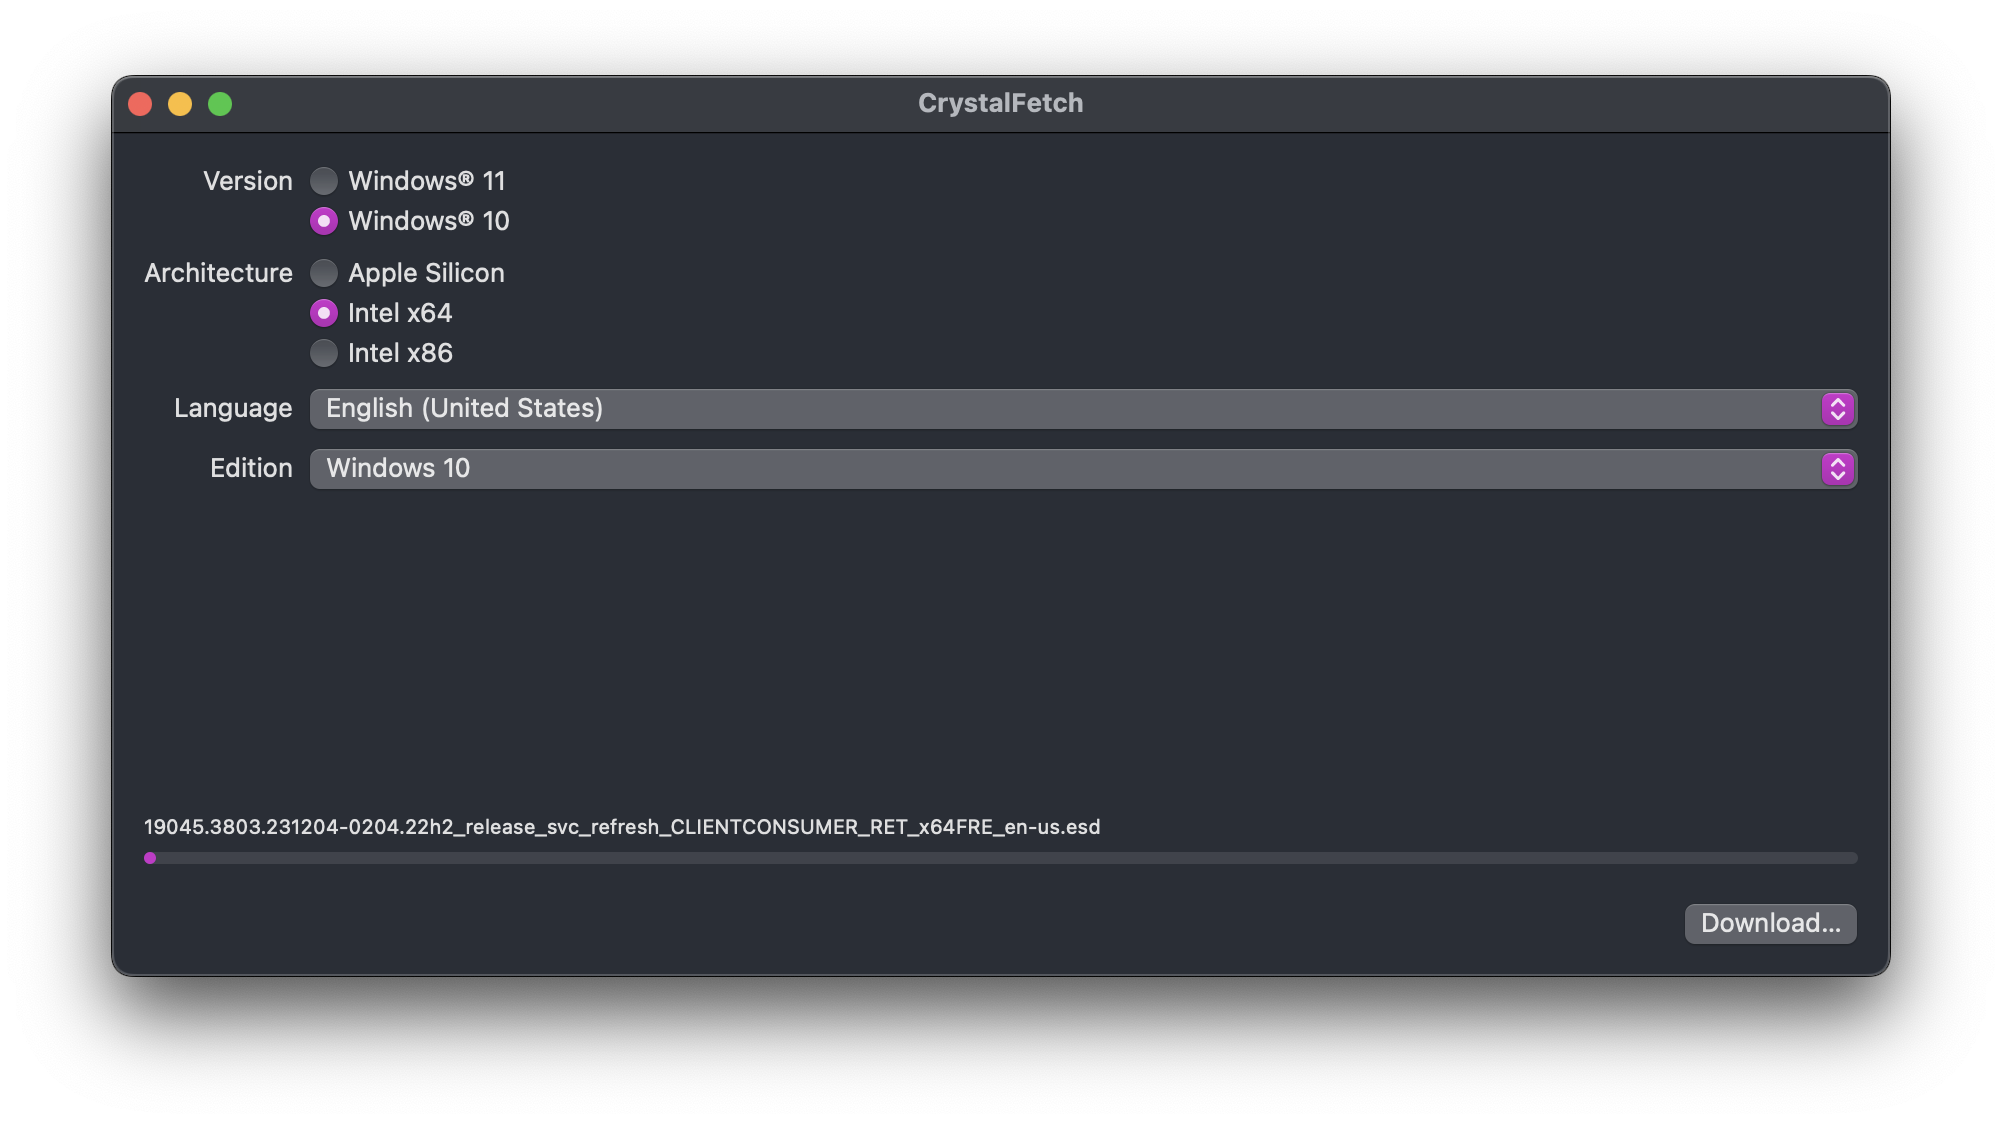
CrystalFetchapp. - Select
Windows 10from the list of versions - Select
Intel x64from the list of architectures - Select any language you prefer, or leave it as default, which should be
English (United States) - Press
Download...to download the Windows ISO file - Select your preferred download location (your
Downloadsfolder is probably the default and good enough) and pressMove.
2. Creating the Virtual Machine
-
Open the
UTMapp.noteWhen launching UTM for the first time, you may get a pop-up asking if you want to open it. Press
Open. You may also get a "What's New" pop-up after it opens. Just pressContinueto go to the next step. -
Click on
Create New Virtual Machine -
Select
Emulateand clickWindows -
Make sure these settings are selected:
Install Windows 10 or higheris checkedImport VHDX Imageis uncheckedInstall drivers and SPICE toolsis checked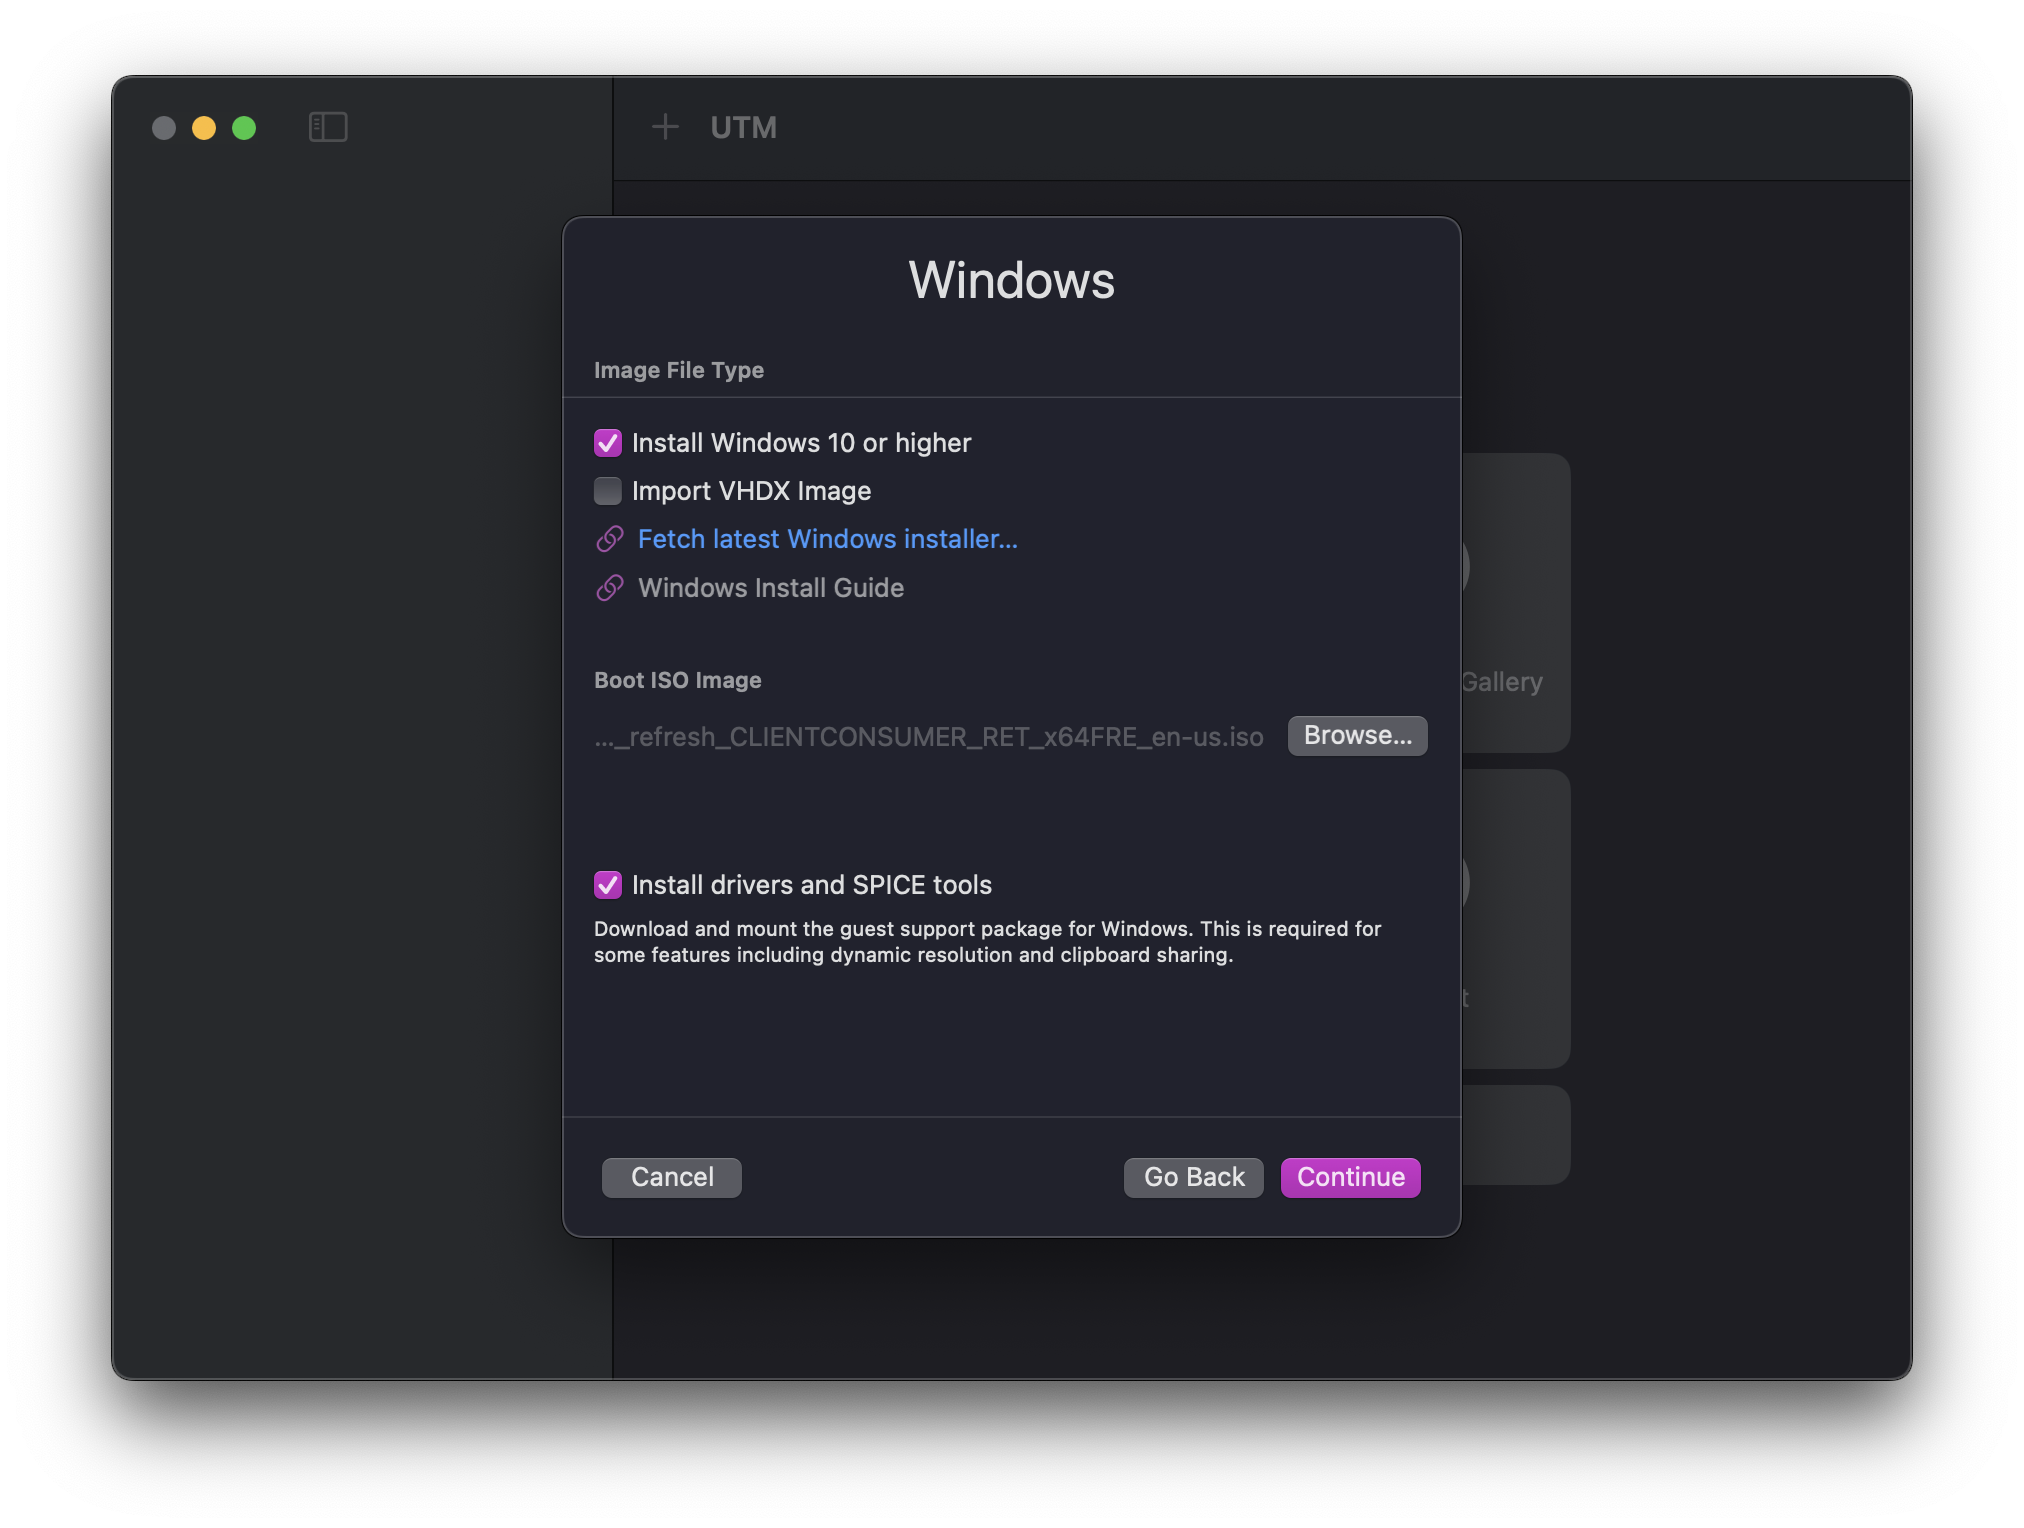
-
Press
Browse...and select the Windows ISO file you downloaded earlier, then pressContinue. -
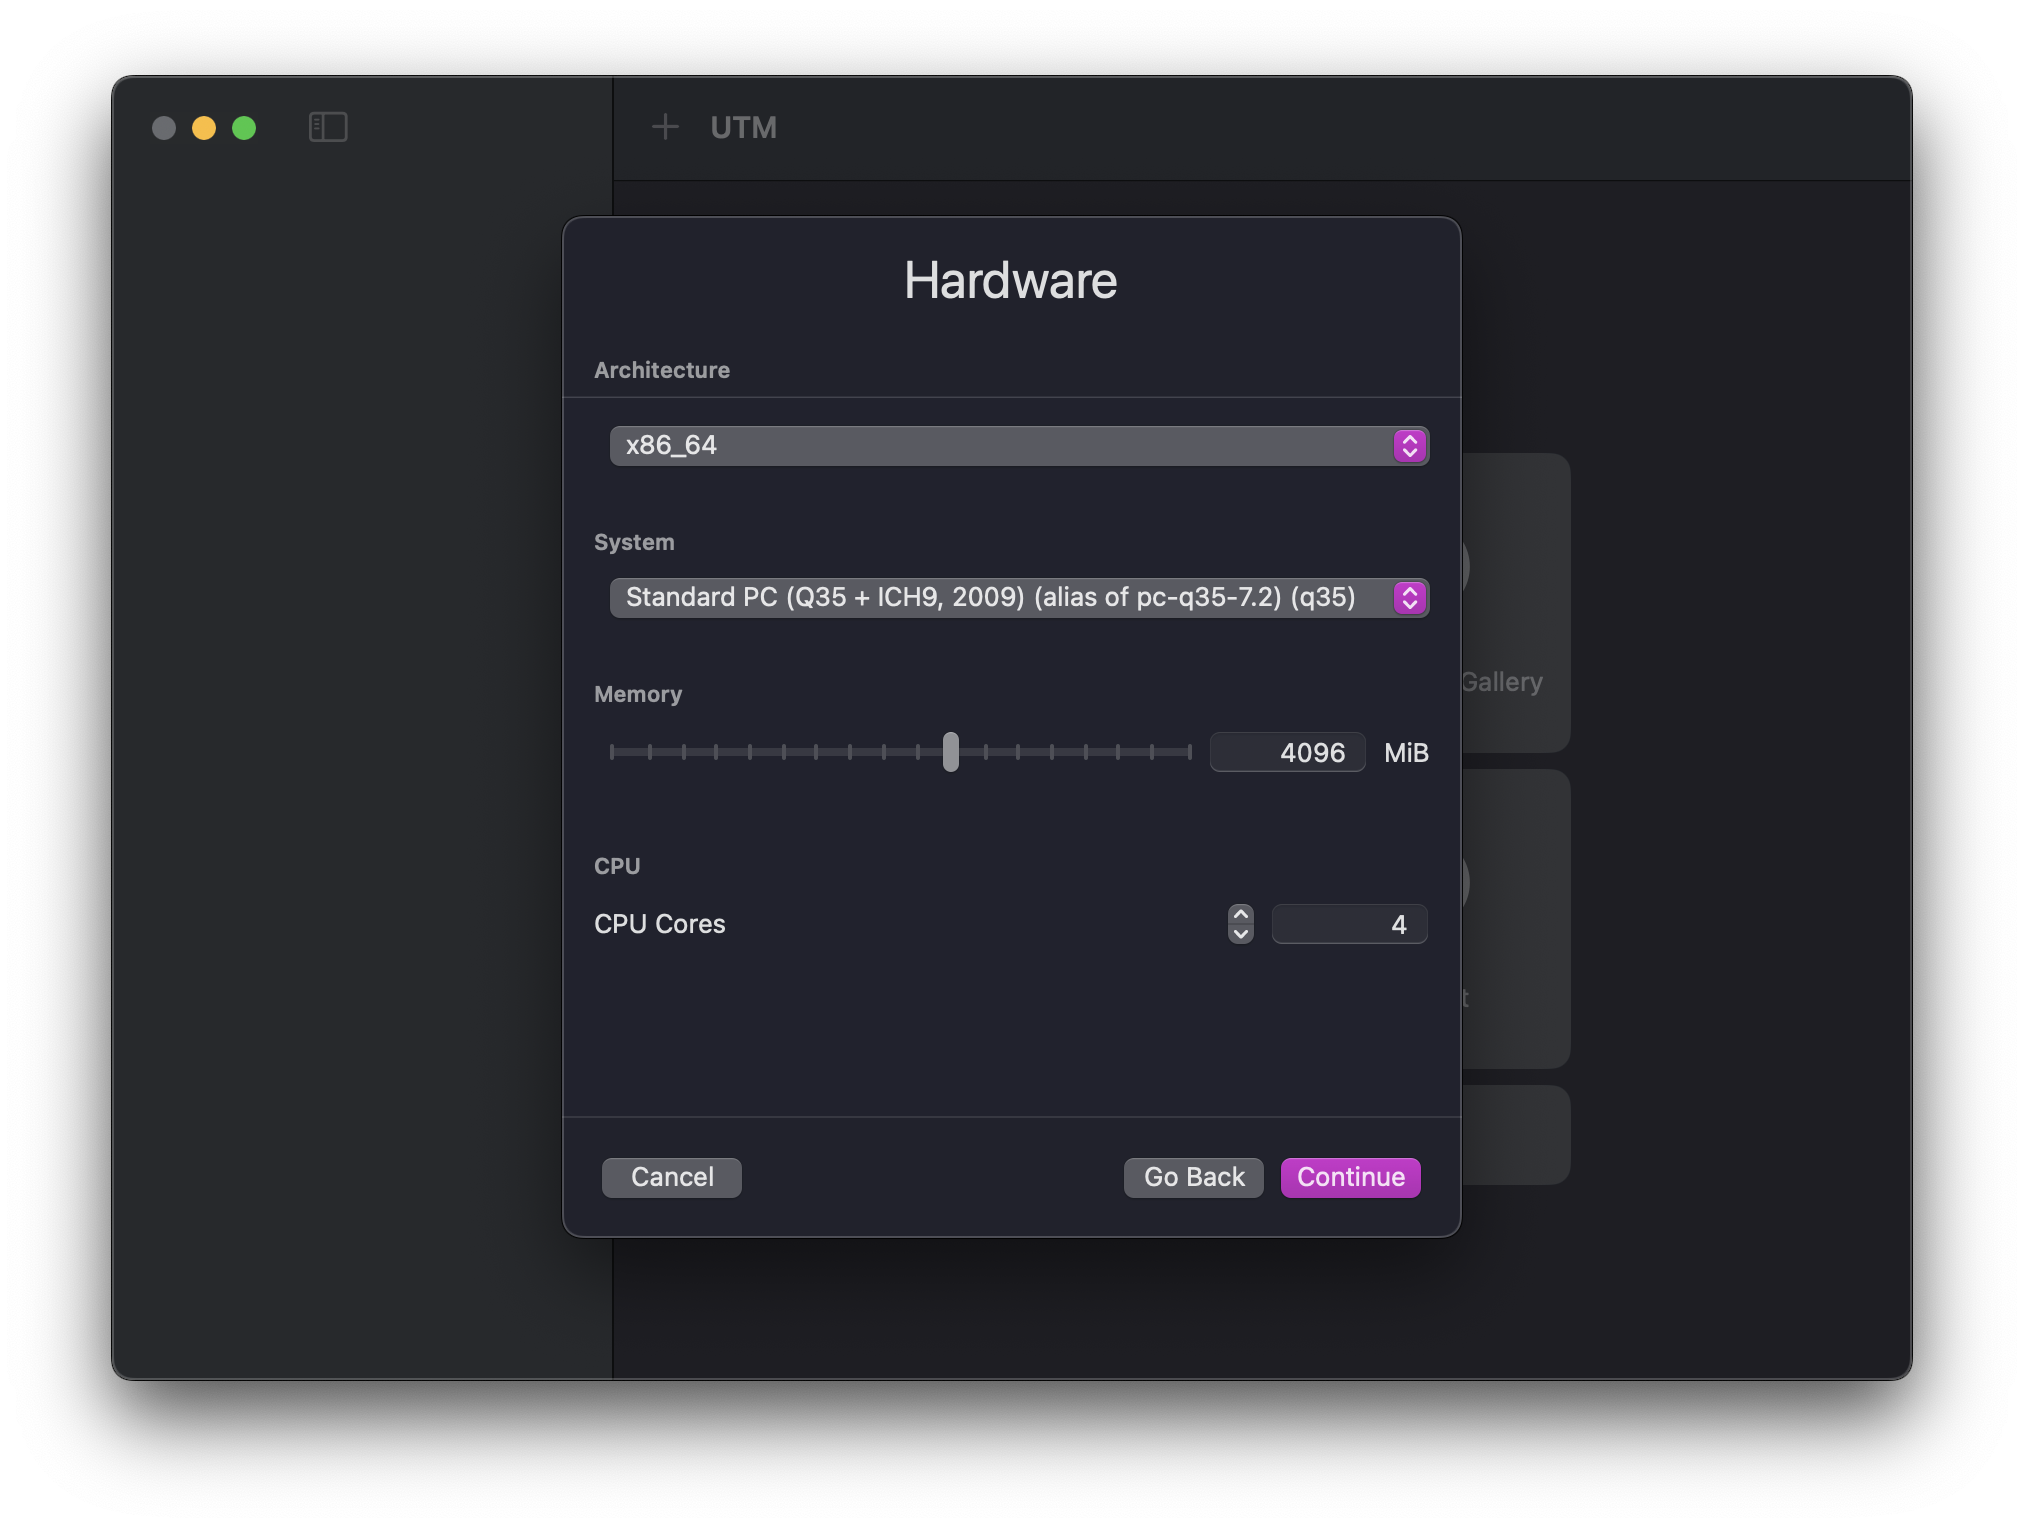
Select the following settings:
Architecture:x86_64System:Standard PC (Q35 + ICH9, 2009) (alias of pc-q35-7.2) (q35)Memory:4096 MB(4 GB) or moreCPU Cores:4or more
-
Press
Continue. The default of 64GiB is fine for the disk size, but you can increase it if you want. PressContinueagain. -
If you wish to make a folder that is shared between macOS and your virtual machine, you can set it up here. Otherwise, press
Continue. -
Change the name of the virtual machine if you want, then press
Save. Don't worry about the other settings.
3. Configuring the Virtual Machine
- Click on the virtual machine you just created and press the configure button
 , which is next to the play button in the upper right corner.
 - Click on
Systemin the left sidebar. - Enable
Force Multicore. - Click on
Displayin the left sidebar. - Enable
Resize display to window size automatically. - Scroll down in the left sidebar and look through the list of IDE drives. You should see three drives. Find the one that has its
Image Typeset toDisk Imageand click on it. - Change the
InterfacetoNVMe. This will make identifying the drive easier later. - Press
Save. - Press
Command + ,to open UTM settings. - Click
Displayin the top bar. - Change the
Renderer BackendtoANGLE (Metal). - Close the settings window.
4. Installing Windows
If you see "Windows Guest Support Tools" under Pending in your sidebar, wait for it to finish installing before proceeding.
- Click on the virtual machine you created and press the play button in the upper right corner.
- When the window pops up, spam any key on your keyboard to boot to the Windows installer.
- Wait for the installer to load.
- Follow the instructions to install Windows.
- When asked for a product key, you can skip it by pressing
I don't have a product key. We will activate Windows later. - Select
Windows 11 Prowhen asked which version to install. - When asked where to install Windows on, there should be only one option in the list. Select it and press
Next.
- When asked for a product key, you can skip it by pressing
- Wait for Windows to install. This will take a while.
- The installer will restart the virtual machine.
5. Going Through Windows Setup
Wait for the Windows setup screen to show up. Setting up Windows is quite straightforward. Just follow the instructions on the screen. However, there are a few things to note:
- Turn off WiFi after completing the Basics section. You can turn it back on after activating Windows.
- If you get any errors that start with
OOBE, just clickSkip. - Deny all privacy settings. Any settings that ask for your location, microphone, camera, etc., should be denied.
- When asked about Cortana, select
Not now. - If you are asked to sign in with a Microsoft account, select
Offline accountand thenLimited experience.
The setup for Windows 11 is slightly different though. To set up Windows 11, follow these steps:
- Select your language and then your keyboard layout
- Press
Shift + Fn + F10to open Command Prompt - Type in
oobe\bypassnro, pressEnter, and wait for your computer to restart. - Continue through with setup, but:
- Do not connect to the internet
- Deny each option in the Privacy section